4. Stator construction
This section tells how to make a stator, using the jigs and moulds from section 3. It
is a good idea to wind a coil before making the stator moulds, so that the mould can
be checked for correct fit.
Winding the coils
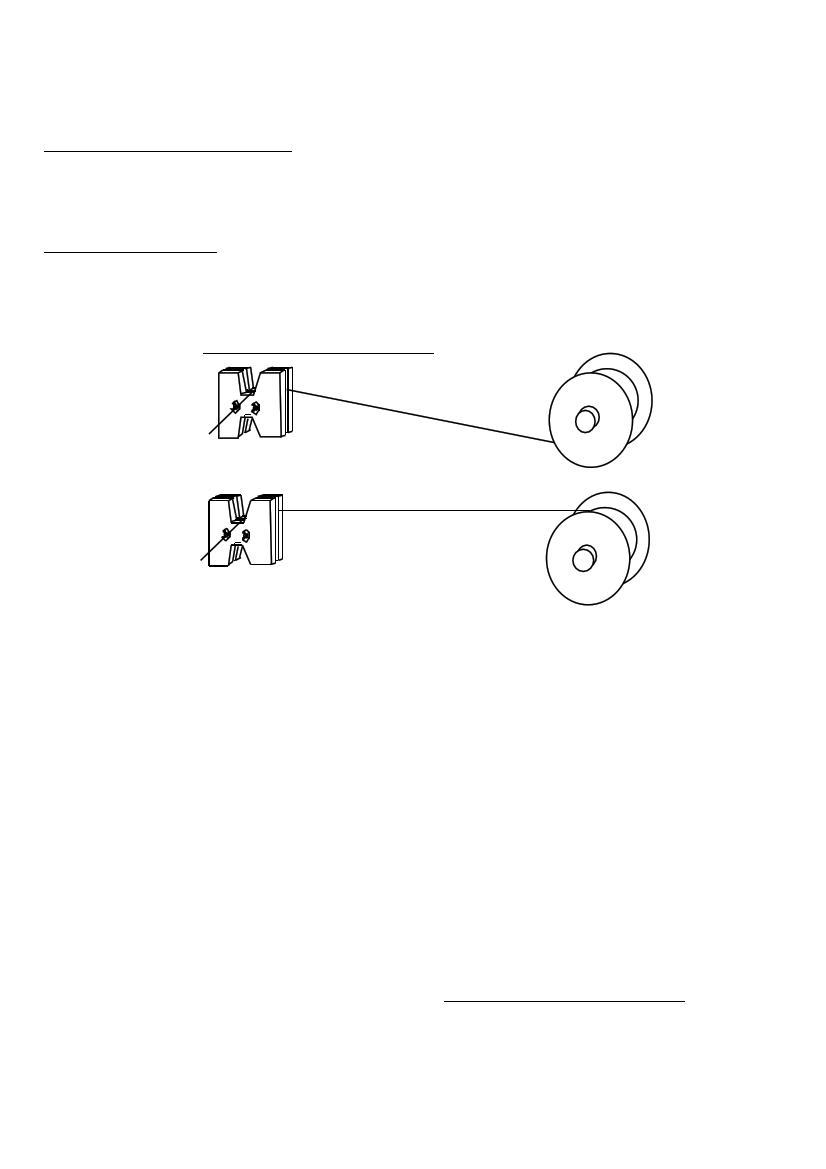
• Mount the reel of winding wire on an axle behind you, in line with the coil former.
The wire should form an 'S' bend as it winds onto the coil (diagram 26).
26. CORRECT WIRE FEED
REEL
(CORRECT)
COIL FORMER
REEL
(INCORRECT)
• Bend the tail of the wire 90 degrees, at a point 100mm from the end. Do not
handle the bend any other part of the wire; leave it straight. Bent wire does not
make a compact coil.
• Place this bend in the notch, so that the tail hangs out.
• Twist the tail loosely around one of the butterfly bolts.
• Grip the wire between the reel and the winder in a piece of rag to keep it tight.
• Wind the handle of the crankshaft.
The first turn lies against the cheek piece on the side where the tail comes out. The
other turns lie against each other neatly, without crossing over. Build the coil up in
even layers. Count the number of turns carefully. Normally there will be 100 turns.
• When the coil is complete, pass a piece of sticky tape under the coil on both sides
and bind it tightly. Do not cut off the winding wire until this is done, or the coil
will spring out, and loosen. Cut the tail of wire 100mm away from the coil.
• Remove the coil from the former, and wind five more coils in exactly the same
way.
• Place the coils on a table (so that they are all exactly the same way up (diagram
27) Check that the starting tail is on the upper surface, and not hidden under the
coil.
• Number the coils 1-6, writing on the masking tape.
PMG manual
page 25
June 2001