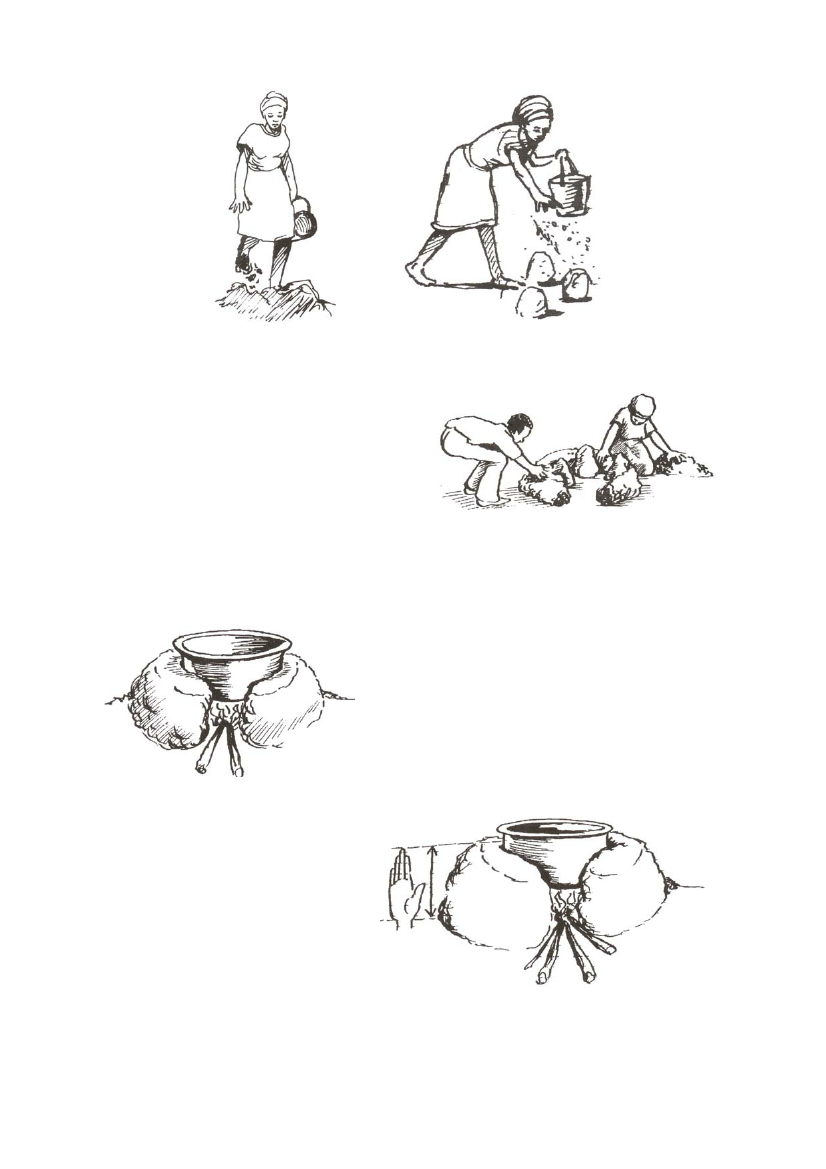
Figure 5.95 Mixing soil with water
Figure 5.96 Sprinkling water on the stones
3. Smear mud around the three stones, blocking two firewood feeding places and leaving one
open. Smear mud around until the height of the structure is about the length of your palm.
4. Smooth out the outer and inner walls
leaving the three stones protruding
inwards to act as pot rests. You could also
place metal pegs inside the stove to act as
pot rests.
5. Let the stove dry for two weeks before
use. The stove could be smeared with
cow dung or ashes to improve its
appearance and seal the cracks.
Figure 5.97 Smearing mud around the three stones
Hoima mud stove
The stove is promoted by extension workers working in the western Ugandan region of Hoima with the
MS Danish Volunteers. It is an improvement on the three stone fire.
Materials used
Clay, sand, water, cow dung, ash, dried grass and three
stones.
Mixing ratios
Three units of clay to three units of sand to one unit of
cow dung to one unit of ash.
Figure 5.98 The Hoima stove
Dimensions
The height of the fire chamber is equal to
the length between the base of the palm
and the tip of the third finger. The
firewood feeding space should be the
same as the height of the fire chamber.
The thickness of the wall should be as
wide as the palm of your hand.
Tools commonly used
Hoe, bucket and a panga
How to make the Hoima stove
1. Prepare mud by mixing soil with
water.
2. Using a sauce pan, place three
Figure 5.99 The height of the fire chamber
stones on the ground where the stove is to be built.
3. Sprinkle water on the stones.
27