cooking.
13. Cut out the stove door. Measure the
height and width equivalent to your palm
laced horizontally with the fingers spread
out. Mark the position first before cutting.
The top of the door should be crescent
shaped. Make a small vertical cut above
the door to prevent cracking with the stove
gets hot and expands.
14. Make two vents through the stove walls
on the sides away from the door to enable
smoke to escape more easily.
15. Let the stove dry for two to three weeks.
Repair cracks immediately they occur by
first wetting them and cutting with a knife
before filling with mud (See Annex 2).
16. Once the stove is completely dry, smear
with cow dung or ashes.
17. Let the stove dry for two weeks before
use.
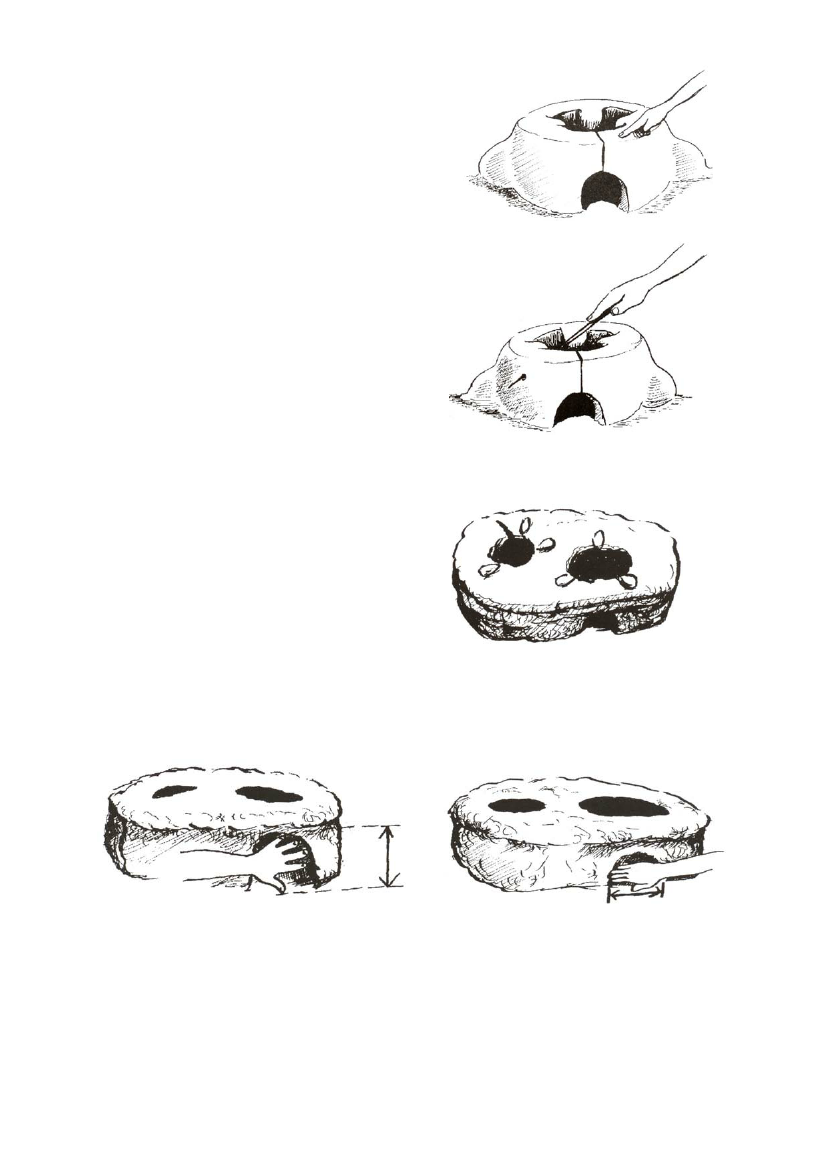
Figure 5.67 The vertical cut
Wasambaa Stove
Figure 5.68 Making a smoke vent
The Wasambaa stove originated from East Usambara in Tanzania and is currently being promoted by
Handeni Integrated Agroforestry Project.
Materials used
Clay or ant hill or building soil and water.
Mixing ratios
There are no standard ratios
Tools commonly used
Panga, hoe, bucket.
Figure 5.59 the Wasambaa stove
Dimensions
The height of the door should be equal to the length
from the thumb to the small finger with the fingers slightly spread and the width should be the distance
from the wrist to the tip of the middle finger. The thickness of the walls should be equivalent to the
width of your palm.
Figure 5.70 Height of the stove door
Figure 5.71 Length of the stove
How to make the Wasambaa stove
1. Mix the materials with water thoroughly to make a stiff mud.
2. Level the ground where the stove will be built and sprinkle with water.
3. Mark out the size of the stove using the most commonly used sufurias, measuring one palm
between the two pot holes and one palm from the pot hole to the edge of the stove.
22