PowerPoint 2007
Working with Lists

Introduction
 Bulleted and numbered lists can be used in your presentation to
arrange and format text
on slides to draw emphasis to specific information. Lists also can often be
easier
for the audience
to read
than paragraphs of text on a slide. In this lesson, you will learn how to modify existing bullets, change bullet style, switch to a numbered list, remove bullets and numbers, and select symbols as bullets.
Working with lists
Download the example to work along with the video.
Some slide layouts include a content placeholder where you can add text or use graphical commands to insert tables, charts, SmartArt graphics, pictures, clip art, and media clips. On these slides, a bullet appears to the left of the placeholder text. If you choose to add text rather than use one of the graphical commands to insert an item, the text is formatted into a list by default.

To insert text as a list in a content placeholder:
- Select the placeholder . The placeholder text will disappear, and the insertion point will appear to the right of the bullet.
- Enter text . If the text requires more than one line, it will automatically wrap to the following line.
- Press the Enter key. A new bullet will appear on the following row.
- Repeat the last two steps until all information is entered in list format on the slide.

The default bullet style and color is determined by the theme. The Urban theme has a different default bullet than the Apex theme.
Using bulleted lists
To select an alternate bullet style or switch to a bulleted list:
- Select all of the text in an existing list (if text has been entered).
- Click the drop-down arrow next to the Bullets command in the Paragraph group on the Home tab. A menu of bullet options will appear.

- Hover over each menu option to display a live preview of the bullet on the slide.

- Click a bullet option to select it. The bullet will change on the slide.
To change the bullet color:
- Select an existing bulleted list (if text has been entered).
- Click the drop-down arrow next to the Bullets command on the Home tab. A menu will appear.
- Select Bullets and Numbering from the menu. A dialog box will appear.

- Click the Color menu on the Bulleted tab.

- Select a color. The bullet options in the menu will change color.
- Click OK to apply the bullet color to the list in the slide.
Using bulleted lists
To change the bullet size:
- Select an existing bulleted list (if text has been entered).
- Click the drop-down arrow next to the Bullets command on the Home tab. A menu will appear.
- Select Bullets and Numbering from the menu. A dialog box will appear.
- Set the bullet size using the Size field on the Bulleted tab.

- Click OK to apply the bullet size to the list in the slide.
To use a picture as a bullet:
- Select an existing bulleted list (if text has been entered).
- Click the drop-down arrow next to the Bullets command on the Home tab. A menu will appear.
- Select Bullets and Numbering from the menu. A dialog box will appear.
- Click Picture on the Bulleted tab. The Picture Bullet dialog box will open.

- Click a picture to select it.
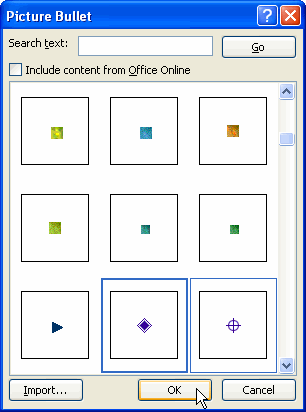
- Click OK to apply the picture to the list in the slide.
Click Import to import your own picture and use it as a bullet.
To use a symbol as a bullet:
- Select an existing bulleted list (if text has been entered).
- Click the drop-down arrow next to the Bullets command on the Home tab. A menu will appear.
- Select Bullets and Numbering from the menu. A dialog box will appear.
- Click Customize on the Bulleted tab. The Symbol dialog box will appear.
- Click the Font: drop-down menu and select a font category.
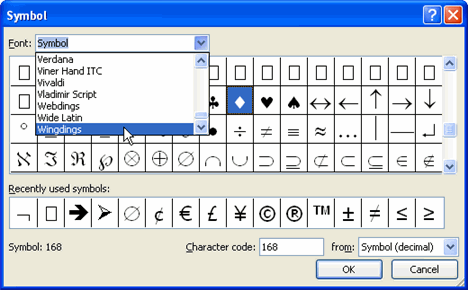
- Click a symbol to select it.
- Click OK. The symbol will now appear as the selected bullet option in the bulleted section of the Bullets and Numbering dialog box.
- Click OK to apply the symbol to the list in the document.
Using numbered lists
To select an alternate numbering style or switch to a numbered list:
- Select all of the text in an existing list (if text has been entered).
- Click the drop-down arrow next to the Numbering command in the Paragraph group on the Home tab. A menu of numbering options will appear.

- Hover over each menu option to display a live preview of the list on the slide.
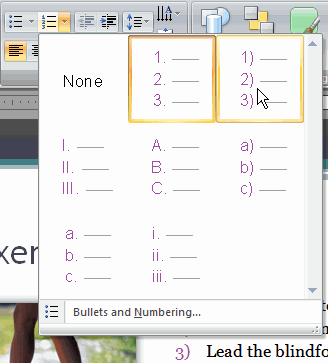
- Click a numbering option to select it. The list will change on the slide.
To change the number color:
- Select an existing numbered list (if text has been entered).
- Click the drop-down arrow next to the Numbering command on the Home tab. A menu will appear.
- Select Bullets and Numbering from the menu. A dialog box will appear.
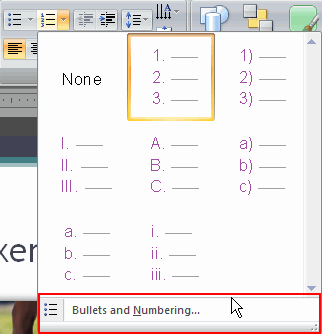
- Click the Color menu on the Numbered tab.

- Select a color. The number options in the menu will change color.
- Click OK to apply the number color to the list in the slide.
Using numbered lists
To change the number size:
- Select an existing numbered list (if text has been entered).
- Click the drop-down arrow next to the Numbering command on the Home tab. A menu will appear.
- Select Bullets and Numbering from the menu. A dialog box will appear.
- Set the bullet size using the Size field on the Numbered tab.
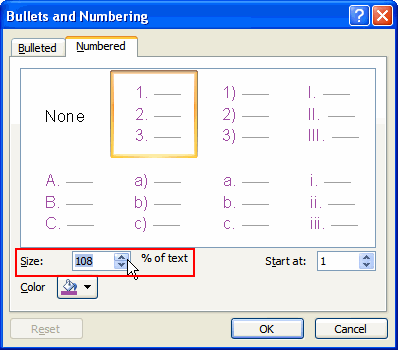
- Click OK to apply the number size to the list in the slide.
To set the number to begin the list:
- Select an existing numbered list (if text has been entered).
- Click the drop-down arrow next to the Numbering command on the Home tab. A menu will appear.
- Select Bullets and Numbering from the menu. A dialog box will appear.
- Enter the number to start the list in the Start at: field on the Numbered tab.
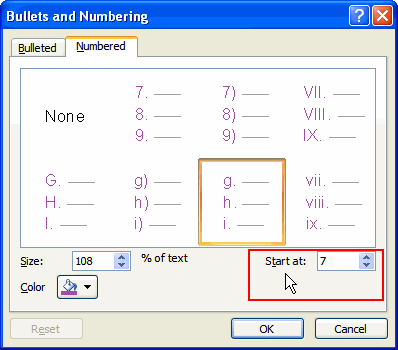
- Click OK to apply to the list on the slide.
To remove bulleted or numbered lists from text:
- Select an existing bulleted or numbered list .
- Click the Bullets command or the Numbering command, depending on the type of list. Click these commands to toggle the feature on and off .
Challenge!
Use the Workshop presentation or any other PowerPoint presentation you choose to complete this challenge.
- Insert a bulleted list on a slide.
- Change the bullets to numbers .
- Change the color of the numbered list.
- Insert a new bulleted list on a different slide.
- Change the default bullet to a different bullet style .
- Change the bullet color .